When you have EPUBs and PDFs that you’ve added yourself to “Books” (formerly iBooks, Apple’s eReader app), they’re added to a special folder within iCloud Drive called “Books”.
Annoyingly, that folder does not appear when browsing the file system, and it is not just simply a matter of it being hidden/invisible.
If it were, the Finder has a keyboard shortcut Command-Shift-. (That’s a full stop, btw) which toggles on/off displaying hidden items.
No, the folder just doesn’t seem to exist in the file system due to the special nature of iCloud Drive.
Thankfully I figured out a way around this, it involves a few steps but makes accessing the folder in future much easier.
First step is to add a PDF into Books on your Mac, then double click on it, which will open it within Preview.
Then, right-click on the file name in the title bar, and there’ll be a drop down list with “Books - iCloud Drive” as the second item. Click that, and it will open the magical special folder in question.
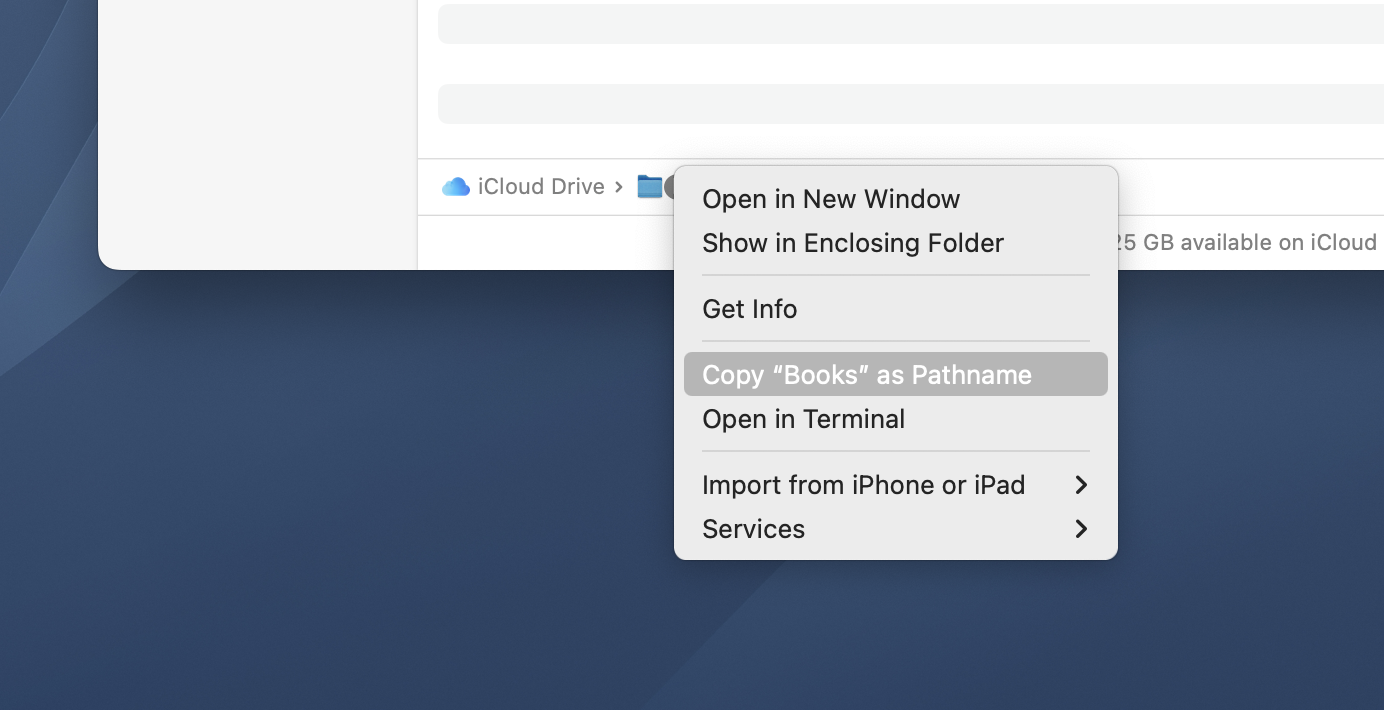
Assuming you have the Path Bar visible, you can just right click on “Books” along the bottom as per the screenshot and choose “Copy “Books” as Pathname”. Paste that pathname somewhere, and remove the single quote marks from the start and from the end. Then copy the edited pathname so it’s in the clipboard.
(Alternatively, you can right click on any item in that “Books” folder whilst holding the option key, and within the contextual menu that appears, there will be “Copy “«filename»” as Pathname”, where «filename» is whatever the filename is. Paste that pathname somewhere, and remove the single quote from the start and the filename and single quote from the end - it should read something like “/Users/«username»/Library/Mobile Documents/iCloud~com~apple~iBooks/Documents/” (without quotes, and where «username» is whatever your username is). Then copy the edited pathname so it’s in the clipboard.)
Next step is to make an alias in the Finder of any item, then “Get Info” on the alias, and click the “Select New Original…” button. Then paste in the pathname (note, not in the Search field, just with the main part of the sheet selected), and the folder shown will now be “Books”. Click “OK”, rename the alias to taste, and place it somewhere handy.
I’ve saved the alias directly into my iCloud Drive so I can access it again easily, rather than having to jump through hoops.
Using Terminal, you can see just how many more items are within “Mobile Documents” A.K.A. iCloud Drive, but I’d suggest not poking around too much :)
Currently listening: MOON ZOOZ (Too Many Zooz + Moon Hooch) - “Space Cow”